I was recently asked how to make a small part of a picture in sharp focus when the rest was blurred. Since this effect might come in useful for you to, I thought I would share my method. (There are many different ways of achieving the same thing).
Firstly I found a clipart image of a magnifying glass and after removing it from its background (using the Magic Wand tool) It was pasted onto the picture I had chosen. The magnifying glass has been moved to cover three birds.
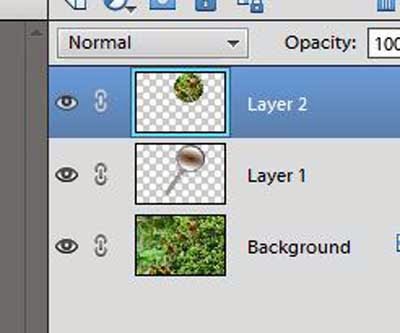
This is how things look in the Layers Palette.
Now I want to select those birds so that they will fit into the magnifying glass. In the Layers Palette I clicked on the eye to the left of the magnifying glass. Doing this makes the layer "invisible" so that you can see what is below.
I then left mouse clicked on the background to make it the "active" layer.
I chose the Eliptical Marquee tool from the tool bar - it may first be seen as a Rectangular Marquee, it is a "multi" button so you have a choice of eliptical or rectangular.
I held down the SHIFT key on the keyboard to enable me to make a circular selection of the birds.
The circle was not in quite the right place so I had to place the cursor INSIDE the circle and move it to where I wanted it. Do not try to grab the edge of the selection or you will create a new selection.
Ctrl +J copied the circle selection and pasted it above the background.
This is how things look in the Layers Pallet now. Notice the "crossed out eye" in the layer that contains the magnifying glass.
I then clicked on the eye to make that layer (glass) visible again and clicked and held the left mouse button down as I dragged Layer 1 so that it was between Layer 2 and Background. The mouse button released when a dark line appeared between layer 2 and Background.
The picture now looks like this (only part of the picture is shown)
The picture does not look very inspiring just yet but we are only half way there!
The next thing I did was select (using the Rectangular Marquee tool ) most of the picture but leaving an even sized border all the way around. Ctrl + J copied and pasted that layer above the Background.
This layer is to be blurred so from the Menu Bar I selected Filter>Blur>Gaussian Blur.
I watched the main picture rather than the preview window as I slide the selection button to the right until I had the amount of blur that I felt was adequate. I needed enough contrast with the sharp image of the birds but not too much that the picture looked really false.
I used the Rectangular Marquee tool again to draw around the blurred layer and went to Edit >Stroke (Outline) Selection to put a white line around that layer. (If I tried to apply a Stroke without using the Selection tool, the stroke was blurred too.
Next the bird layer was selected (click that layer in the Layers Palette) and re-sized to fit inside the round shape of the magnifying lens (Ctrl +T gives the Transform tool) To create a more natural look I went to Layer>Layer Style>Style Setting>Glow.
This makes the glass look as if it is convex (slightly rounded)
And here is the final image.
If you are observant you will notice that the handle of the magnifying glass is in a different position, I rotated it a little before I flattened the image! The "Transform" handles on that layer are still showing!
AJ