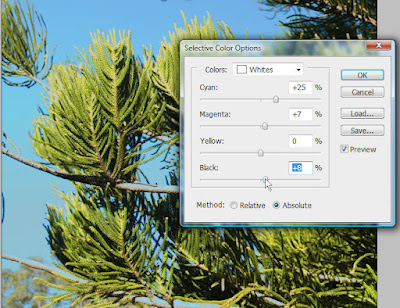
Continuing on from yesterday's tutorial on using Selective Color - I would like to show you how to determine just what is affected by the colour change. 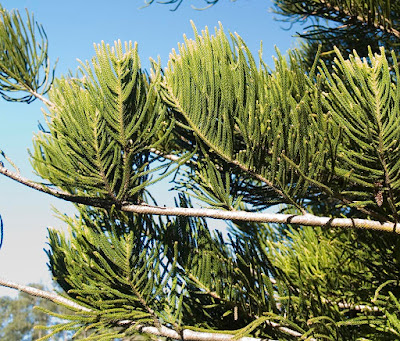 To begin with, duplicate the layer and click on the round button that is half black, half white. Select white as the colour to be changed and slide the colour sliders and the black slider to change the white to match the blue at the top of the picture.
We shall take the same photo we used yesterday but this time I am going to change the sky. The lower left of the picture is really over exposed and white and I would like this to be changed to blue.
 To begin with, duplicate the layer and click on the round button that is half black, half white. Select white as the colour to be changed and slide the colour sliders and the black slider to change the white to match the blue at the top of the picture.
You will notice in the layers palette that there is a white box beside the Selective Color symbol. This is a "reveal all" mask.
Click on the white box.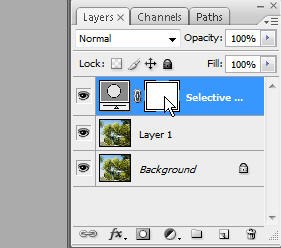

Now select a soft edged brush and with black as the foreground colour paint away the blue that is in the wrong places - in my picture the white of the branches and tips of the leaves has also been changed to blue. 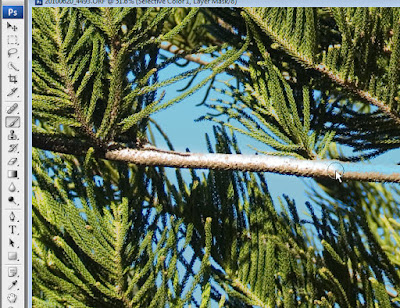 You will need to use the magnifier to get in very close so that you can be accurate in your brushwork. Zoom in and take care as you paint - it required a very small brush to remove blue from the tips of the green leaves and I would not even have seen that it needed doing until I zoomed in.
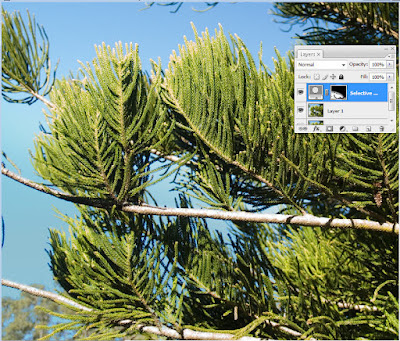
 You will need to use the magnifier to get in very close so that you can be accurate in your brushwork. Zoom in and take care as you paint - it required a very small brush to remove blue from the tips of the green leaves and I would not even have seen that it needed doing until I zoomed in.
Zoom out and enlarge the brush and paint over the upper part of the sky and tree where the original colour was stronger. You can see on the tiny image of the mask where the brush has been worked (on the picture above).
Here are the before and after pictures. 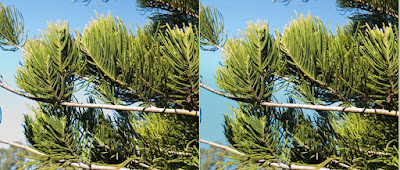

The left hand picture has the white in the sky and the one on the right has more colour. Too much colour would be artificial, so try not to be heavy handed!
AJ
No comments:
Post a Comment