When I wrote advising on how to change the colour of various parts of your images by using Selective Color I didn't give you the full instructions but a few people have had a try and have run into a few problems - the color is in places where it is not needed. How do you get rid of that? 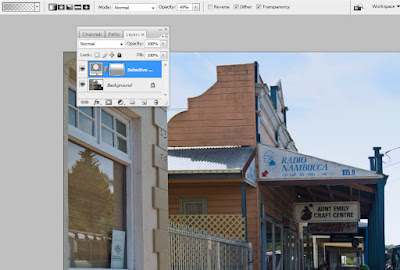
Again I will demonstrate with the changing of the colour of the sky and show you the extra steps that I take. I must rush in here to remind you that there are many different ways of doing any task in Photoshop and I am not telling you the only way, just my way. 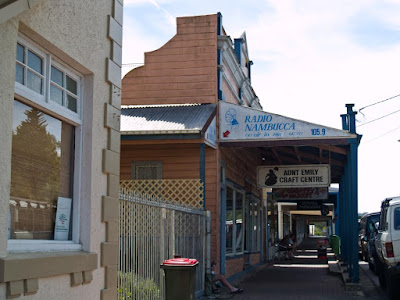
For this tutorial I am making no tweaks or sharpening at all. I do not wish to confuse by giving too many tutorials in one mail!
Step 1. Do any corrections such as cropping, transforming (correcting badly aligned verticals)and straightening the horizon etc.
Step 2. Click on the round symbol half black, half white that gives you the drop-down box for Selective Color.
Step 3. Chose the colour you wish to change - for this sky I selected white - and move the sliders to give the hue and shade you feel is best. Click OK.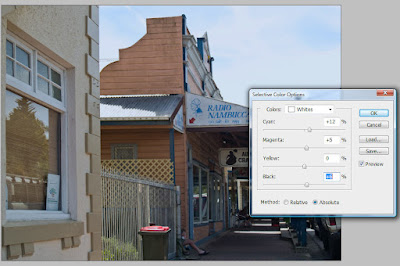
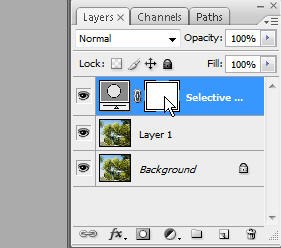
Step 4. Click on the white square besides the image in the Layers Palette and from the tools panel click on the gradient tool. Change the opacity (at the top of the screen) to about 55%.
Step 5. Click in the gradient box (top left of the screen) and make sure that the gradient pattern is foreground (black) to transparent and a straight gradient - not a circular gradient or any other shape!
Step 6. On the picture drag the gradient from blow the horizon up to about halfway into the sky. The idea is to have a slightly lighter horizon - if the light and dark areas have an obvious line where they change, undo and make the drag over a larger area. Start a bit lower and finish a bit higher in the picture.
Step 7. This is a definite improvement but the highlights on the lean-to roof have also been turned blue, as have the window frames of the window on the left. From the tools palette chose the brush tool and select a hard edge. With the Opacity set to 100% paint over the buildings and foreground features (white cars) that might have been tinted.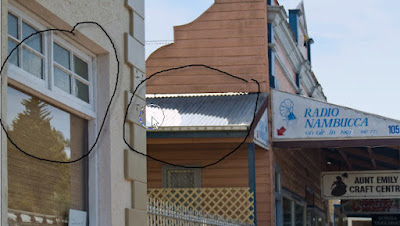
You can see where I have painted with the brush tool and black onto the mask in the circled areas. It does not hurt to increase the brush size and paint over the entire area that is not sky.
Step 8. Flatten the image and save with a new name.
Here is a composite picture to show the before and after of this Selective Color change.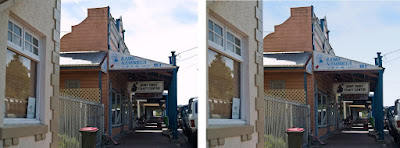
Once I have changed one colour I sometimes flatten the image and then do a Selective Color change on something else - such as greens that look rather yellow (Selecting Yellow as the colour to change) - again I will use the brush tool to paint out the yellow items that I do not wish to colour change - such as clothing, signs, vehicles and so on.
Flatten the image once the colour change has been done and then (and only after all other tweaks have been done) apply Sharpening.
AJ


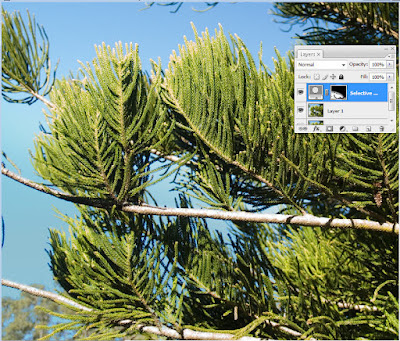
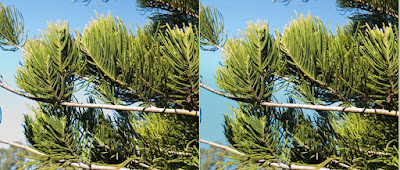
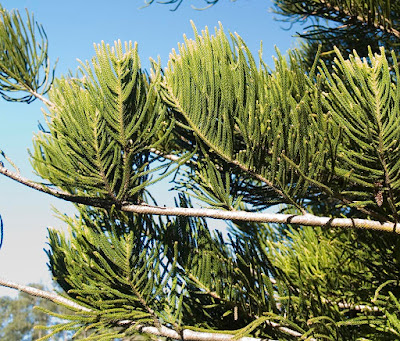 To begin with, duplicate the layer and click on the round button that is half black, half white. Select white as the colour to be changed and slide the colour sliders and the black slider to change the white to match the blue at the top of the picture.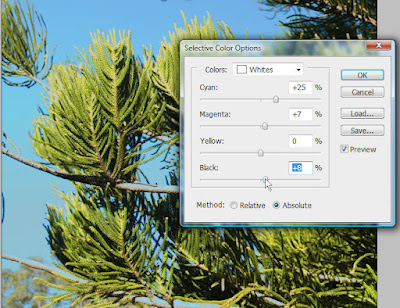
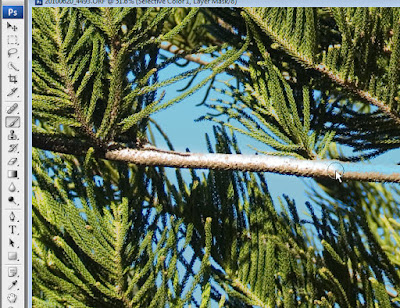 You will need to use the magnifier to get in very close so that you can be accurate in your brushwork. Zoom in and take care as you paint - it required a very small brush to remove blue from the tips of the green leaves and I would not even have seen that it needed doing until I zoomed in.