Wednesday, July 14, 2010

Fingal dolphins

When Colin and I took out Sunday car trip to Fingal Head we were hoping to see whales. It was a clear day and the sea was quite gentle. Hearing shouts and seeing a few people pointing in one direction our eyes were directed to a patch of water where there were dozens of fins breaking the surface. I estimate there would have been twenty or more dolphins swimming towards us.

This was taken with the Nikon P90 which requires the user to activate the live-view (big screen on the back) and then press the OK button to start the recording. Since I had been using the camera as a telescope previously the focus was already set to the right distance.

This is nothing spectacular but just a bit of fun - if you are observant you will see what I didn't see at the time - a whale in the distance just breaks the surface as the clip ends!

AJ

Sunday, July 11, 2010

Using a texture to give mood

I walked through between a stand of trees to reach a lighthouse today. The trees looked mysterious and foreboding and I thought I would try and capture that dark mood. When I brought the image in to Photoshop it looked interesting but still not as atmospheric as when I aimed the camera at it. The photo is just a photo of a few trees. Yes, you can see that it is dark enough under the trees for no grass or small plants to grow but there is very little about the picture that holds the attention. I added a small amount of vignette to the edges and corners which helped keep the eye inside the picture but still it did nothing for me!
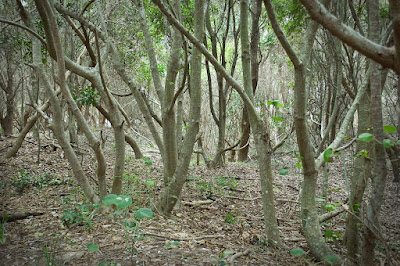
Click to see a larger picture
That's when I decided to have a play with one of the texture images I have taken. I selected a shot of the bark of a gnarled and woody Eucalypt that is growing my my own backyard. The vertical patterning would suit the upright nature of my trees, I felt.
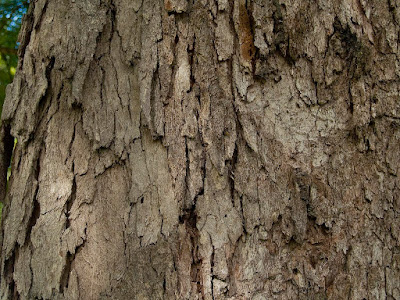
I have not used textures to any extent so this was an experiment to see what would happen.
The texture was pasted over the worked picture of the trees and I scrolled through the various blending modes to see what blend worked the best. Up and down through the different blends I went two or three times and the one that suited this picture the best was Overlay. At full strength it was rather too heavy so I reduced the opacity a bit.
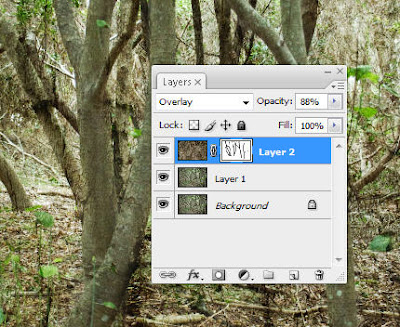
Then I felt that the tree trunks were lost in all the pattern and what would they look like if I revealed them a bit more? I applied a mask and used a soft brush at 70% to paint over the major trunks and branches.
Liking this effect I did no more! It is a temptation to keep on doing more and more to a picture! So the layers were flattened and this is the end result.
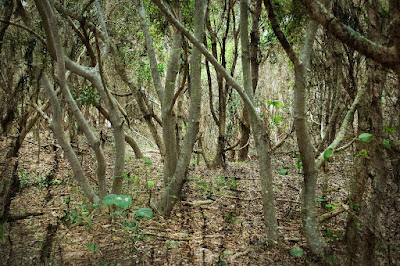
Click to see a larger picture
Now this image has loads of mood! Much better than the original shot!
AJ

Friday, July 9, 2010

ten minutes in the garden

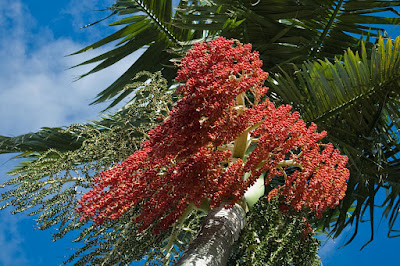
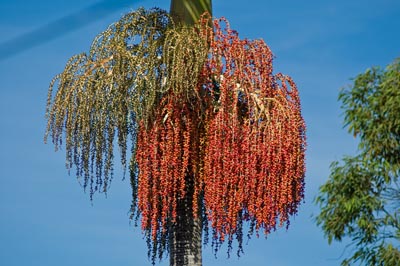
I have a new camera and not enough hours in the day! Snatching a few minutes between hanging out washing and mopping the floor I managed to give my camera digit a little exercise! The sun was out and the red berries on the palm tree looked so beautiful.
When the camera first arrived I did take a long distant shot of the palm tree from the veranda but I thought it might look rather special taken from directly underneath it. Today I used the 18-55mm lens. I was lucky to get some blue in the sky and the sunlight on the berries because the wind was strong and only seconds later the sky was grey and sprinkling rain.
f/8 1/125 ISO 200 55mm
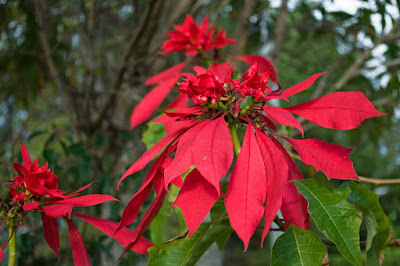
The next two shots - taken only a couple of minutes later - were taken when the sun was filtered by cloud. The Poinsettia grows freely in this part of the world and is a striking garden shrub. I have two varieties, the more common single red that is used as a decoration at Christmas time and this double - which I think is even more beautiful than its better known cousin.
f/5.6 1/50 sec ISO 125 55mm
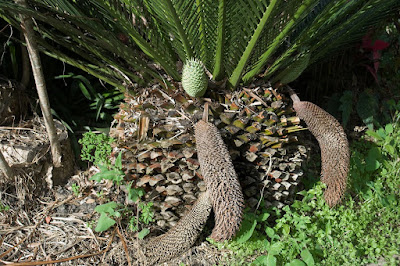
The sun peeked out briefly as I crouched under the prickly leaves of the Cycad to take this shot of the flowers. This is the male plant and the female plant is in the back yard - it has a crown of a flower that will produce hundreds of chestnut sized seeds.
f/5.6 1/125 sec ISO 125 32mm
Although the cycad is an eye catching decorative plant it is one to be careful of - every frond on each leaf carries a vicious spine at the end and if it pierces the skin caused the wound to really ache painfully. The spines are about a centimetre long and wicked!
AJ

Monday, July 5, 2010

A character of the Australian Bush

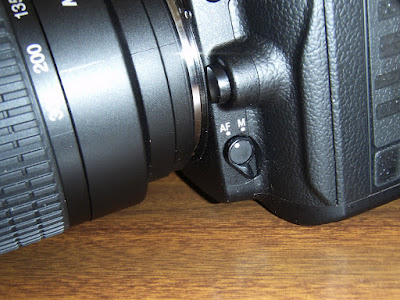
I takes me a while to find my way around my new toys! I thought it was rather strange that I had no manual control over the 70-300mm lens on my new Nikon D90 - well, I found out that all I have to do is switch a lever on the front of the camera near the lens and I have isolated the lens from the auto controls! I am happy now!
With my previous camera I selected an option from the camera menu for manual control - not with this one!

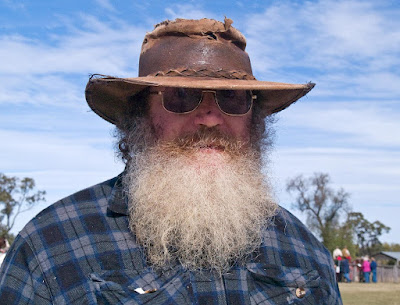
While looking through my pictures - I do that occasionally! I came across this character study I took when I visited Jondaryan for the heavy horse work day. This man was marching across from one place to another when I stopped him and asked if he minded if I took a photo of him.
f/10 1/500 sec ISO 400 28mm

He was a little embarrassed but I chatted to him once I had fired my shot. Fortunately the Olympus camera was still working this day and the first shot was a good one because this fellow was not going to stand still for any longer than he had to! I asked him if he was exhibiting his horses today and he opened up about his training methods and his aspirations. I married a country fellow so I know that the way to get a "bushy" to open up is to talk about his main interest. Since we were at a heavy horse demonstration day it was a safe bet that this man was also interested in heavy horses.

AJ

Sunday, July 4, 2010

An addition to the Selective Color tutorial

When I wrote advising on how to change the colour of various parts of your images by using Selective Color I didn't give you the full instructions but a few people have had a try and have run into a few problems - the color is in places where it is not needed. How do you get rid of that?
Again I will demonstrate with the changing of the colour of the sky and show you the extra steps that I take. I must rush in here to remind you that there are many different ways of doing any task in Photoshop and I am not telling you the only way, just my way.
For this tutorial I am making no tweaks or sharpening at all. I do not wish to confuse by giving too many tutorials in one mail!
Step 1. Do any corrections such as cropping, transforming (correcting badly aligned verticals)and straightening the horizon etc.
Step 2. Click on the round symbol half black, half white that gives you the drop-down box for Selective Color.
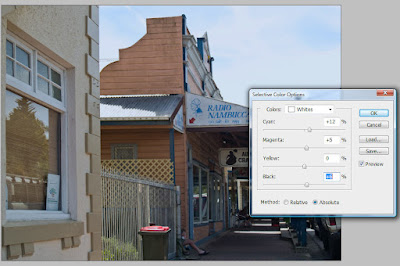
Step 3. Chose the colour you wish to change - for this sky I selected white - and move the sliders to give the hue and shade you feel is best. Click OK.
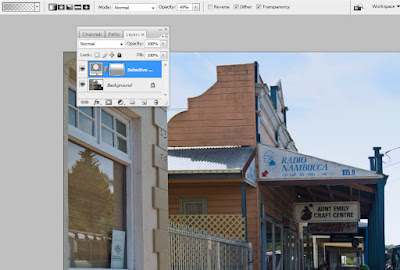
Step 4. Click on the white square besides the image in the Layers Palette and from the tools panel click on the gradient tool. Change the opacity (at the top of the screen) to about 55%.
Step 5. Click in the gradient box (top left of the screen) and make sure that the gradient pattern is foreground (black) to transparent and a straight gradient - not a circular gradient or any other shape!
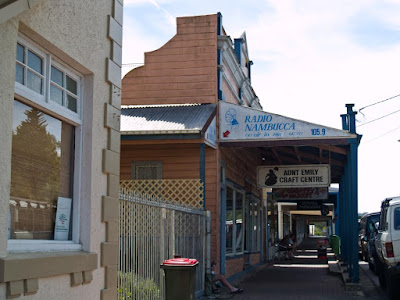
Step 6. On the picture drag the gradient from blow the horizon up to about halfway into the sky. The idea is to have a slightly lighter horizon - if the light and dark areas have an obvious line where they change, undo and make the drag over a larger area. Start a bit lower and finish a bit higher in the picture.
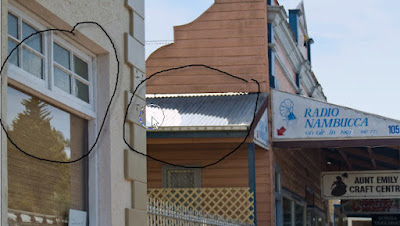
Step 7. This is a definite improvement but the highlights on the lean-to roof have also been turned blue, as have the window frames of the window on the left. From the tools palette chose the brush tool and select a hard edge. With the Opacity set to 100% paint over the buildings and foreground features (white cars) that might have been tinted.
You can see where I have painted with the brush tool and black onto the mask in the circled areas. It does not hurt to increase the brush size and paint over the entire area that is not sky.
Step 8. Flatten the image and save with a new name.
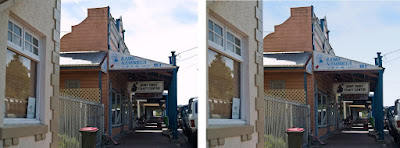
Here is a composite picture to show the before and after of this Selective Color change.
Once I have changed one colour I sometimes flatten the image and then do a Selective Color change on something else - such as greens that look rather yellow (Selecting Yellow as the colour to change) - again I will use the brush tool to paint out the yellow items that I do not wish to colour change - such as clothing, signs, vehicles and so on.
Flatten the image once the colour change has been done and then (and only after all other tweaks have been done) apply Sharpening.
AJ

Trying the 300mm lens

This is so exciting!
we are having visitors at lunch time today so I have been slogging away at housework but coffee time gave me that window for picking up the camera and trying out the BIG lens!
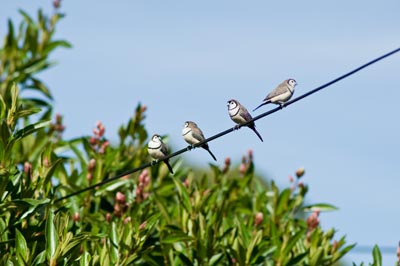
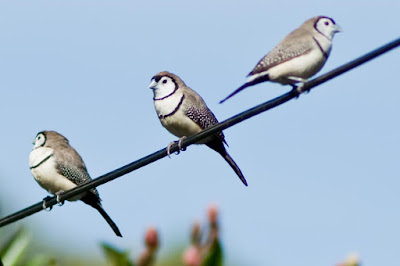
First thing I noticed was that although I have chosen AF-S (autofocus single as against AF-C which is autofocus continuous - for moving subjects) this 300mm lens does not allow manual focus! There is a switch on the smaller 18-55mm lens that allows me to switch from AF to M but not this one. I thought this would be a problem but I went into the menu to set the focus to "spot" and take a look at this photo of the finches on the wire. When I zoom right in you can see how accurate the spot focus is.
First the uncropped photo showing the way the shot has isolated the birds from the trees behind.
f6.3 1/800 sec ISO 200 180 mm
Now severely cropped to show the accuracy of the spot focus.
Isn't that great!
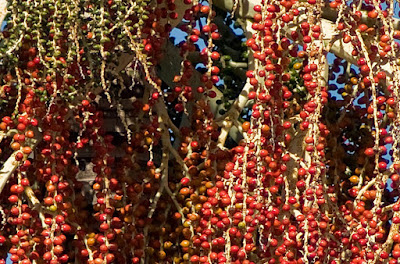
At the end of our driveway is a palm tree that is sporting a colourful hula skirt of fruits at the moment. From my shooting position on the veranda there is a wire that crosses the lens - you can see the vague shadow of it in the top left corner - the tree must be forty metres from where I was standing.
First the uncropped picture showing the brilliant red berries and some green ones.
f/5.3 1/800 ISO 200 190mm
The second picture is a crop from it and you can see a few of the green berries so that you can work out where the crop was taken.
I have done no further sharpening so I am stoked that I will be able to rely on the camera to get the focus right. The color is spot on too. This was one of the main reasons I chose Nikon over the other cameras I have handled, the color and the sharpness of the images.
AJ

Saturday, July 3, 2010

New camera, new experiences

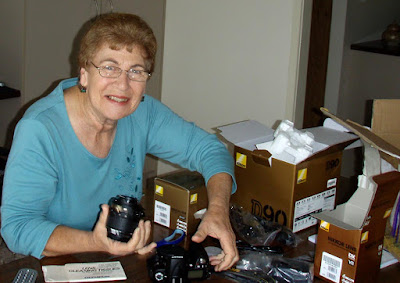
Yesterday my new camera arrived! I have at last got the camera of my dreams - I never thought I would ever be able to afford such a beauty but when my Olympus 500E made life so difficult (playing up in a way that was too frustrating for words) I was given a push by my ever supportive husband and I ordered a Nikon D90 with two lenses, 18 -55mm VR and 70-300mm.
I only had time for a few test shots yesterday - enough to get me really excited!
The quality of the images is out of this world! The colours are so accurate and the sharpness with the auto-focus absolutely brilliant. The composition is up to me, so between us, this camera and I should have a wonderful future!
Once the family had left us after a fun time at the local park, Colin and I piled into the car so that I could exercise my trigger finger. The sky was blue and the sun deliciously warm for a winter's day so this was my opportunity to take more photos and leave the housework for another time!
We live on the coast but there is some beautiful countryside all around us so we headed south and slightly inland stopping first to buy some tree ripened bananas from a local grower before driving through the cane fields to a small town of 7000 residents.
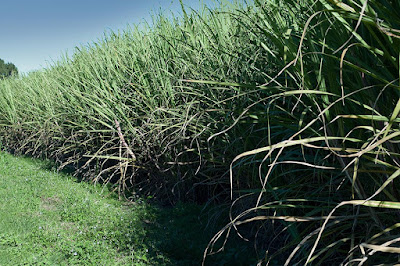
Just before we reached the town we came across a cycle race and since the road was quite narrow and the pack of cyclists quite numerous, I pulled the car over and took a couple of shots of the sugar cane. (only one of the shots is included here.)
f/10 1/125 sec ISO 200 55mm
The photo stop gave enough time for the cyclists to turn off the road we were on and we drove into the town with no hold-ups. I spotted an unusual church spire so that had to be investigated. A woman was cleaning inside the church and noticed me peering through the open door and invited me in to the church to look around. The stain glass windows were superb - but at this stage I was using only the 18-55mm lens which was not suitable for the height of these gorgeous windows. So I just looked! The church interior looks to be an ideal place for artistic photography. I may try that another day!
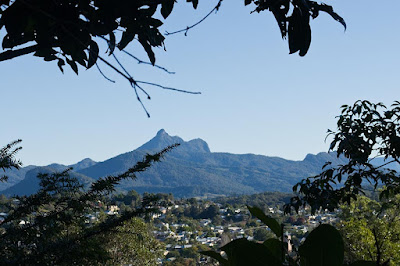
Colin and I motored up to the lookout beside the water tower and I took this shot of Mount Warning, an imposing but small mountain that was once a mighty volcano that actually was responsible for creating the landscape in this area of New South Wales. The "Scenic Rim" is a wonderful drive through rainforest and mountains and is the outer rim of the ancient volcano we now call Mount Warning.
f/16 1/125 sec ISO 200 55mm
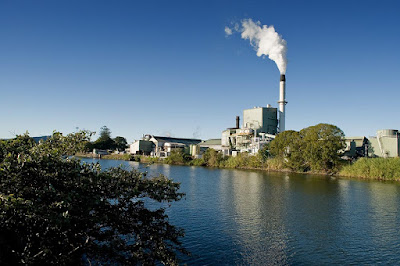
Leaving Murwillumbah for home we approached a sugar mill from the south and the light through the steam rising from the tall chimney was inspiration for yet another photo session!
The steam looked the best from the main road but the better angle for photos of the sugar mill were from a little to the west of it. This meant that the steam did not have that same glow. It is difficult to get everything perfect!
I like this shot taken over the top of the sugar cane.
f/20 1/125sec ISO 200 52mm
By walking on to a very busy bridge over the Tweed River I was able to take a shot to show the mill's location on this wide meandering waterway.
f/14 1/125 sec ISO 200 18mm
This is the first time I have been able to use a camera by setting the shutter speed and allowing the camera to set the aperture. With the Olympus 500E I was only able to use it in full manual mode and of course I had to take several shots before I would get the settings exactly as I wanted them. With this camera the first shot I took looked so good I didn't need to take it again with a new setting! I am going to love this camera!
Now I need to have an opportunity to try out the long lens!
AJ