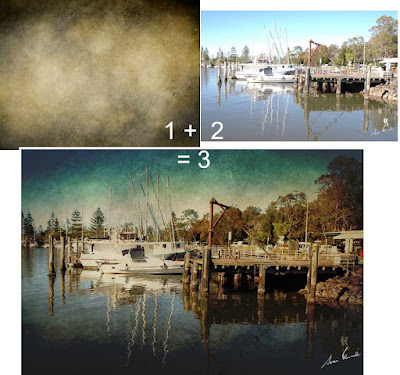
 Just for fun and because it is Sunday and I have time to myself (wonderful) I downloaded a texture from one of the contributors at Flickr "skeletalmess" and had a bit of fun applying it to one of my uninspiring photographs to see how it would change it.
To combine two images it is important to first have them the same size.
With both the texture and the picture open in Photoshop I clicked on the texture to make it the selected image. Then I clicked on Image>Image size to bring up the resizing box. No alterations were done here, what I did next was to click on "Windows" in the menu bar and down at the bottom were listed the two images that were open in Photoshop. I clicked on the obscure name of the boats tied up at the wharf (letters and numbers assigned by the camera) and then clicked on OK in the Image Size box (which was still open).
The texture suddenly changed in size. It became very much bigger. In fact it became exactly the same dimensions and pixels per inch as the other picture.
Now I selected all (Ctrl +A) to select the texture and then copied it (Ctrl +C).
Clicked on the other picture and pasted the texture (Ctrl + V).
Of course, now I could see nothing except the texture. The image had been completely covered.
In the Layers palette I clicked on the blending modes ("Normal" is the default setting) and started to scroll through all the different blending options, pausing when I found one that I liked or found interesting.
Eventually I returned to Linear Burn and then reduced the opacity to 70%. Now this is what I finished up with. 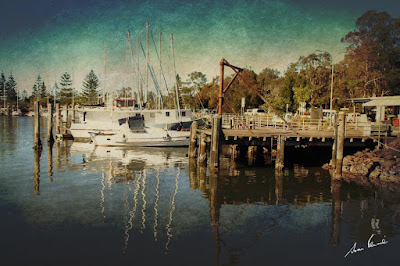
Click here for a larger image. If ever there is a highlighted word in my text it will link to a larger picture.
After this experience I spent quite a bit of time downloading several textures to my HD for future play!
AJ
No comments:
Post a Comment